Cleaning / Laundry / Cooking & Baking / Canning / Gardening / Entertaining / Mending / Sewing / Gracious Civility / Organizing / Handwork / Beekeeping

Saturday, August 17, 2013

Baking: Pizza Fixings & Hot Cocoa Mix = Tasty Creations

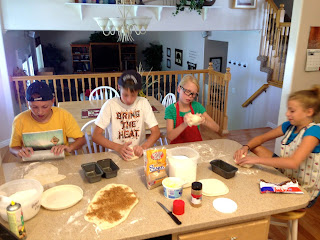
This summer's baking day had my kids making dough.  They practiced making my grandmother's refrigerator roll dough recipe which is very versatile and fool-proof.  Find the recipe here: http://teach12homeskills.blogspot.com/2012/04/baking-refrigerator-roll-dough.html  We fit baking day into the same day as canning day and so the kids had friends over.  I divided up the dough so that each kid could make 2 mini loaves of their own creations.  My son came up with some creative additions and my daughter decided to go for the savory as well as the sweet.  Here's how it turned out:
Here's the group attacking their dough.

My son decided to fill one loaf with Stephen's Candy Cane Cocoa.

I was a bit skeptical, but it turned out rather tasty.  It would make great holiday rolls.

The pizza roll contigent with their pizza sauce, pepperoni, Italian seasoning, cheese and garlic.

My boy wanted to put food coloring on his, and I thought it would be a great way to distinguish everyone's loaves.

Hot out of the oven!  Color-coded loaves ready to eat.

My girl with her cinnamon bread and pizza bread.
My boy with his peppermint-cocoa loaf!
 A fun time was had by all, and we've now found a new use for any leftover Stephen's cocoa!


Canning: More Fun With Friends

This year, our canning project was simple to say the least.  I had purchased a large bucket of pitted, pie cherries from an orchard.  So right of the bat, a lot of the work was done for us.  This gave me the chance to focus more on the basics of canning.  As you might imagine, not all of my children were enthusiastic about canning day.  So when I suggested they each invite a friend to help, it really improved the overall mood.  Here's a few of the lessons we learned:
1. Importance of cleaning and sanitizing the jars - food safety starts with the container.
2. How to fill the jars and how full to fill them.
 3. Prepping the lids and rings.  Again, clean and sanitized is the key.
 4. All 4 canners working together.
 5. All 7 of our quarts sealed. 
6. We can look forward to 7 of these!
Thursday, August 15, 2013

Cooking: Iron Chef - Cousins Edition

My kids wanted to have an Iron Chef competition with their cousins this summer.  Any time they have an idea that is: 1. doable 2. creative and 3. teaches a skill, I try to let them go for it.  So one morning my sister and I got the kids together and each of us brought a secret ingredient.  My sister provided couscous and I provided root beer.  After unveiling the secret ingredients each team (boys vs girls) had one hour to prepare an appetizer, entree and dessert.  Each course had to include both secret ingredients.  The girls cooked in my sister's kitchen and the boys in mine.  We synchronized our timers and they were off.  Although both homes did smell a bit smoky for the rest of the day, the damage was not much more than a bunch of dishes to clean up.  And at the end of the hour - we reconvened at my parents home where a younger cousin judged.  After all prizes were awarded, all 9 of us sat down for a creative yet tasty lunch.
These two were serious competitors dressed for the occasion.

My son finished with time to spare.

The winning presentation: Couscous & tomato bruschetta with root beer vinaigrette, couscous & beef stroganoff salad, vanilla sundaes with root beer syrup and couscous-graham crumble topping.

The girls were a close second with: Couscous salad & crostini, root beer teriyaki chicken over mashed sweet potatoes and root beer ice cream with strawberry couscous and chocolate syrup.

The judge with his tasting duties.

Iron Chefs!

Monday, August 12, 2013

Cleaning: The art of hospital corners

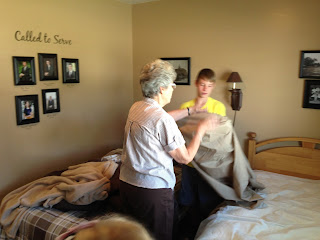
I was raised by a wonderful housekeeper as I know I've mentioned before.  Luckily, we get to live across the street from her and so I thought I'd take advantage of that and let my bed-making-maven-of-a-mother teach my kids the art of folding sheets and making a proper bed.  No, this is not my kids' first exposure to this domestic activity, but due to the unconventional nature of my kids beds, hospital corners hasn't always been feasible.  Plus, I knew that they'd take instruction from their grandma better than from their mom.  Oh, and a promised trip to Maid-Rite (get the bed-making humor?) for lunch afterward probably helped as well.
Teaching the trick to folding fitted sheets.

My son gets his lesson in a nicely folded fitted sheet.

She's awfully proud of that tidily-folded fitted sheet.

Now for the bed making process.  They were even taught how to determine the right side of the flat sheet and to remember that a person should only come in contact with the right sides of the sheets like a sandwich. 

Hospital corners part I

Hospital corners part II

Hospital corners part III

Finished product - nice and tidy!

Sunday, August 11, 2013

Baking: Anatomy of a wedding cake

My sister-in-law got remarried this summer, and I made the wedding cake.  Although my kids didn't help out much besides eating cake scraps, I did try to explain the steps and talk them through the process.  Here's the anatomy of my sister-in-law's (and brother-in-law's) wedding cake:

A trip to the nursery instead of the florist provided the succulents she wanted.

The the baking process: their request of Funfetti, though very light, was fine for the top layer.  They'll freeze and eat on their 1st anniversary. 

A dense coconut cake formed the base.  I made it hollow so that they would be able to cut the cake at the reception and still have the stability of something structurally stronger to support the top three layers (see below).
The middle layers of the cake pre-made, wrapped and waiting in the fridge.  Yes, that is rice crispie treats. My mother made my wedding cake with the middle layers made from rice crispie treats and after peeling off the frosting (unwrapping the plastic wrap), my hubby and I took it on our honeymoon and ate it for breakfast and as a car-snack.

They wanted an off-centered stacking of the layers.  Since it was an outdoor, more rustic-style wedding, I used a round pine board from the hardware store cleaned and oiled with vegetable oil as the cake plate.

Back to the structure.  Nothing works better in a wedding cake than rice crispie treats.  It is strong, yet light weight.  Plus, it generally gets eaten more readily.  Just form the rice crispie treats in a cake pan lined with plastic wrap and frost as you would any other layer. 

A simple cardboard round leveled the rice crispie treat center with the cake.  The middle layers were simply frosted rice crispie treats. 

Off-white butter cream.

Burlap and orange were themes for the wedding, so I pre-oiled the burlap ribbon, wrapped and tacked each seam with pins.

Ah - my least favorite part - transporting the cake.  Luckily it was an uneventful 30 minute drive, but still I did get a good bicep workout compensating for all the curves. 

Adding the succulents and orange flowers (from my backyard daylilies and trumpet vine) was too tempting for my daughter to not get in on the action.  I guess being a flower-girl had a double meaning for her that day!


The finished product!

After a couple hours of looking pretty, every wedding cake meets it's demise.  They actually ended up serving the cake at the reception, and to be honest - I chose a piece of rice crispie treat! 


Thursday, August 8, 2013

Entertaining: Party Planner Age 13 = Chaotic, Messy, Science Fun

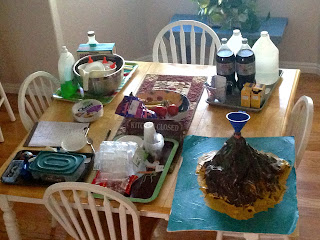
This summer I paid my 13 year old boy $20 to plan, carry-out and clean-up the annual Science party.  It was a bit of a leap of faith for me as a control-oriented mom, but it was a smashing success (and the grass spots have since recovered).  So if his future wife isn't a natural-born party planner, he can throw fun parties for my grandchildren.  *wink*


He made himself a list of what activities, how long they would take and in what order they should happen.

His accumulated supplies the day before the party.

Day of the party he made the treats: dirt cups and homemade root beer were on his menu. 

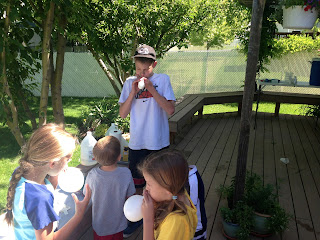
Who doesn't like a little fun with dry ice?

Helping the kids with the first experiment.

Making slime.

Homemade bubble concoction.

Wednesday, August 7, 2013

Cleaning: Freezer Fun

Ah, the beauty of a clean freezer!
I know that this hardly looks like a good time, but it's amazing how much better you feel after having dejunked and cleaned the freezer.  I still have to attack my chest freezer in the garage, but at least the kids get to help me baby step by starting with the freezer above the fridge.  Don't just wait to tackle all the cleaning and organizing projects once school starts and kids are no longer under-foot.  Tempting though it may be to do a quicker, better job yourself, the fact is that someday they'll be facing a cluttered freezer themselves and if you want your grandchildren to grow up in a home with a clean freezer, you've got to bite the bullet and involve them in the chores. 

Amazing that all this fits on into my fridge freezer!

Still a bit full, but trust me - it looks much better than before we started!